Many of you might have experienced that the speed of the mouse is running either too slow or too fast. Due to this, you face difficulty navigating on your desktop. Either you restart your computer or try to fix the errors in Windows 10 or 11. Are you puzzled about where to locate the issue? Worry not! You can fix the issues easily. If you want to change mouse speed in Windows 10 or 11, jump into the article and get your issue resolved within no time. You can easily fasten the speed or lower the speed of your mouse.
How to Change Mouse Speed in Windows 10 or 11?
Changing the Mouse speed on Windows 10 or 11 is super easy. In Windows, there are options to personalize your mouse in several modes. Anyone can change the functionality of mouse buttons, get the mouse pointer extra prominent, and modify the mouse wheel’s scroll speed. I know it is triggering your mind how to do it. Well, it is understandable that many of you are unaware of changing the mouse speed in Windows. To get more information about it, follow the steps in the subheadings below. Also, read How to Open Disk Management on Windows 10 or 11 Instantly!
How to Change Mouse Speed in Windows 10 or 11 in Settings?
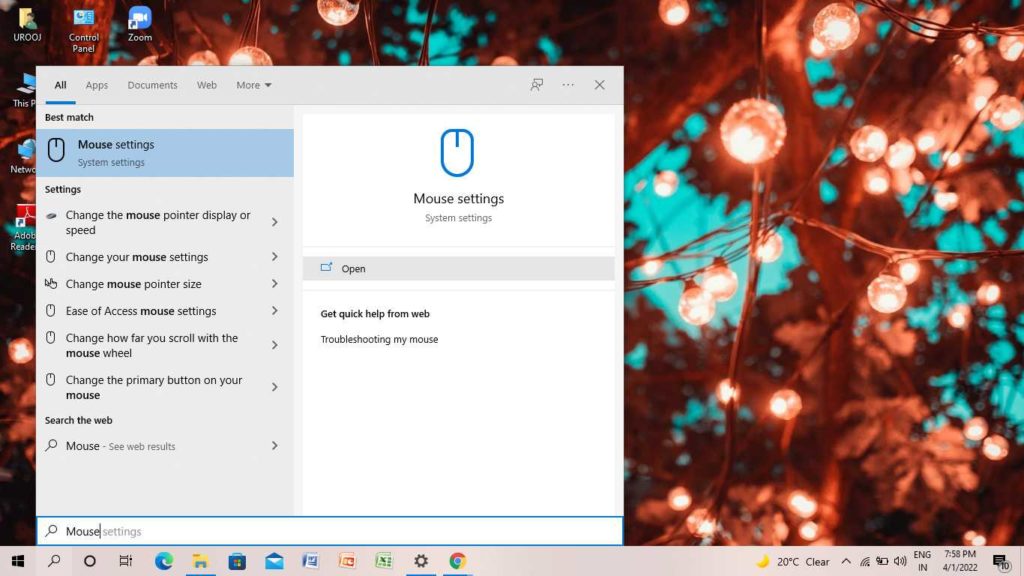
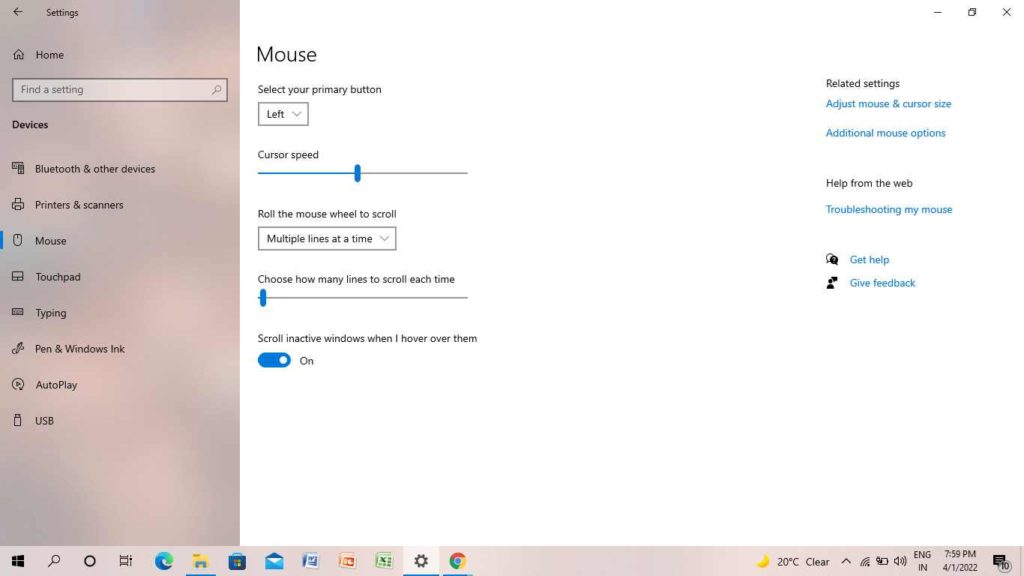
If you want to know how to change Mouse in Windows 10 or 11 in Settings is easy, you can do it with the help of the following steps- 2. Press the Windows key + S or go to the Search bar beside the Windows Start icon. 3. Write Mouse in the search bar. 4. Click on Mouse Setting. 5. On the next page, change the settings of a mouse. Here, you can alter the settings of the following options:
Primary button(left or right).Change the cursor speed.Roll the mouse wheel to scroll (multiple lines at a time or one screen at a time).Choose how many lines to scroll each time.Turn inactive windows on or off.
Also, read How to Stop Auto Update in Windows 10 | Pause Updates in Windows
How to Change Mouse Speed in Windows 10 or 11 in Control Panel?
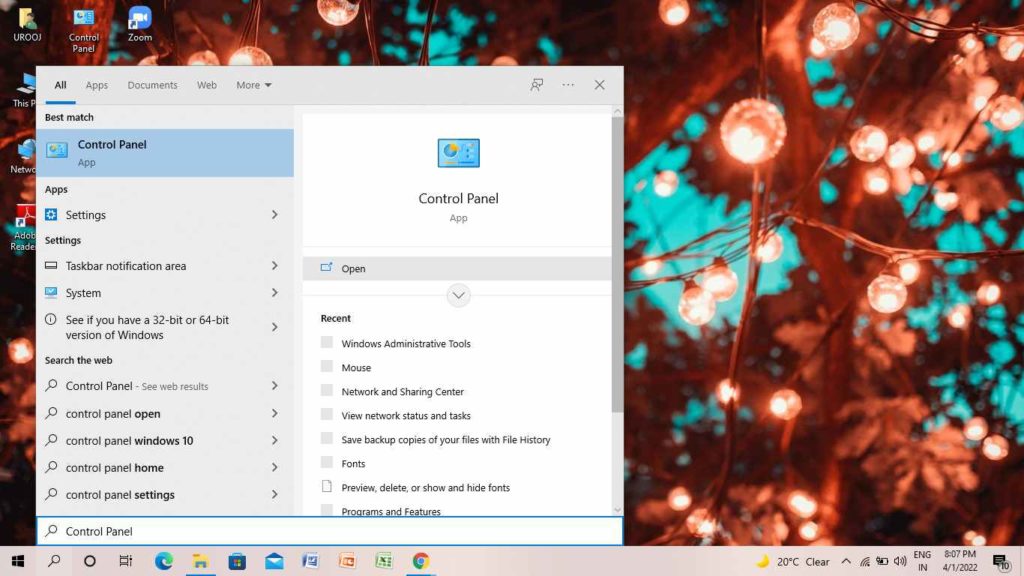
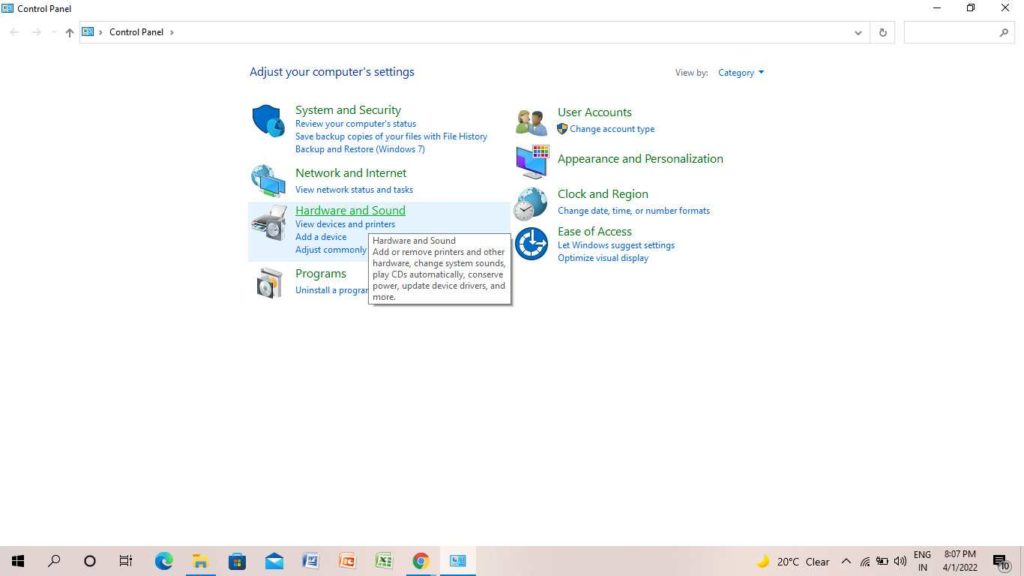
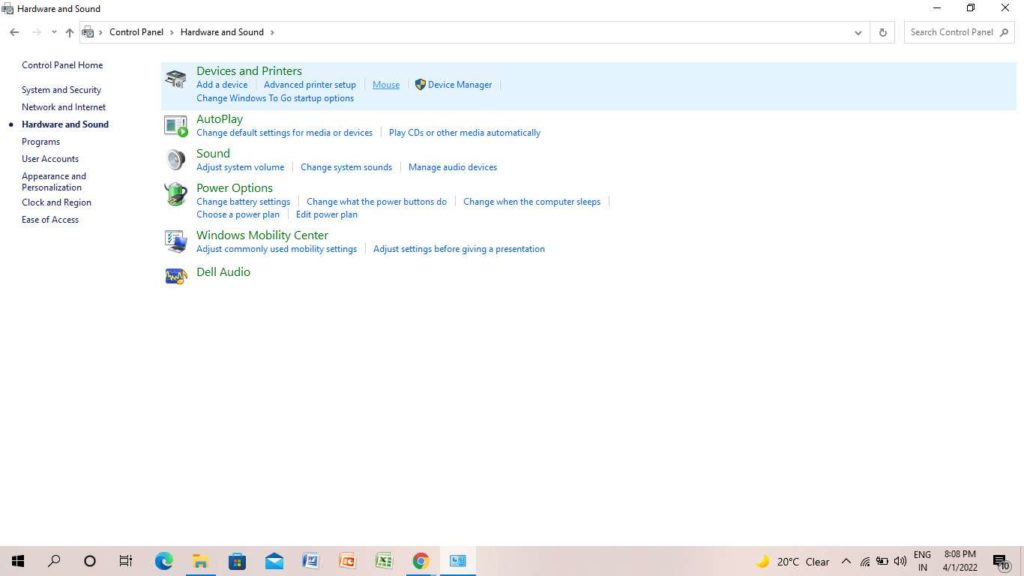
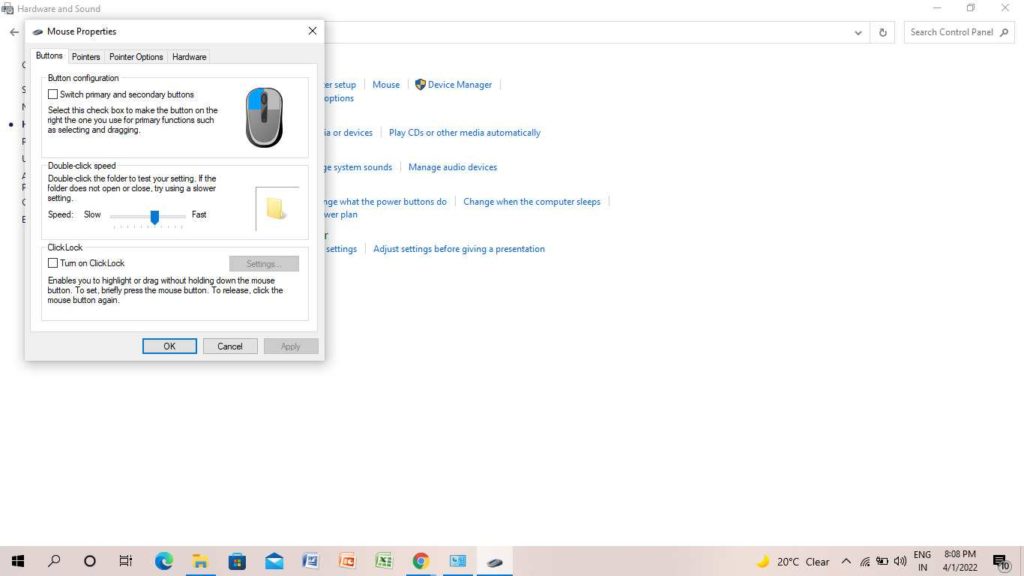
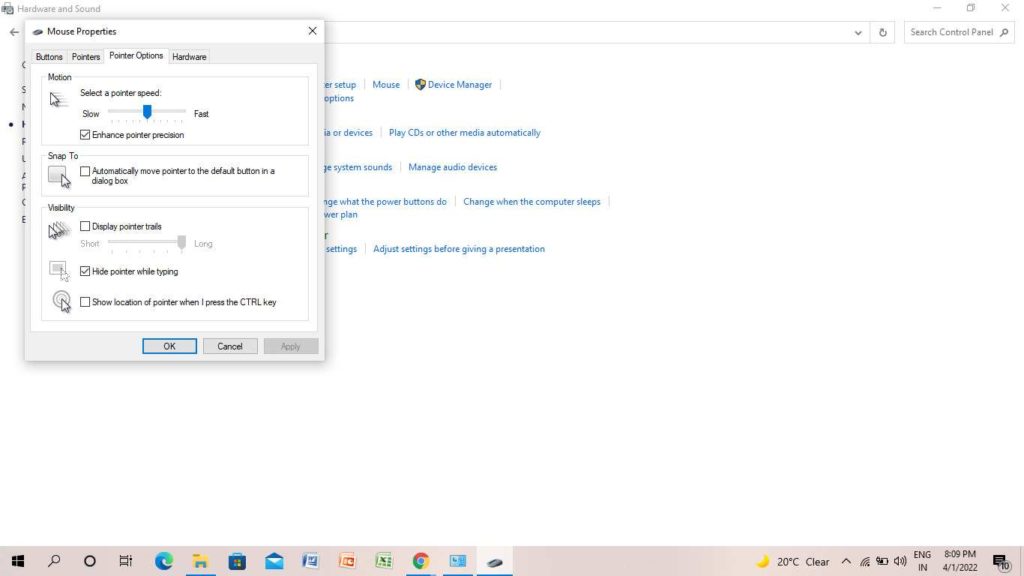
There is also an option to change the mouse speed in Windows 10 or 11 in Control Panel. For this, follow the steps below- Press the Windows key + S or go to the Search bar beside the Windows Start icon. 2. Search Control Panel. 3. Open the Control Panel app. 4. Tap on Hardware and Sound. 5. Tap on Mouse. 6. Change the speed of the Buttons, Pointers, or Pointer options. 7. Under Pointer options, decrease the speed. Drag the slider and set the speed. 8. Once you have made the changes, tap on Apply. 9. Finally, tap on Ok. Also, read How to Change Your DNS Server on Windows 10 in 2022
How to Change Mouse Speed in Windows 10 in Registry?
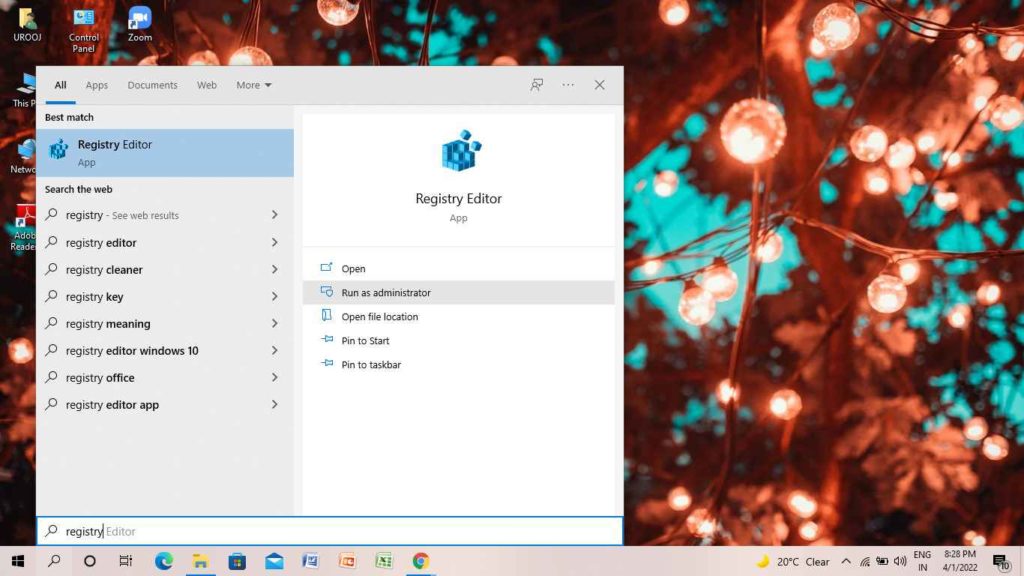
If you want to change Mouse Speed in Windows 10 in Registry, you can do it easily with the help of the following steps- Press the Windows key + S or go to the Search bar that is beside the Windows Start icon. 2. Enter the Registry in the search box. Or Press Windows key+ R and the shortcut of Run box will appear. 3. Enter the regedit.exe in the box. 4. Tap on Ok. 5. A pop-up will appear to ask your permission, tap on Yes. 6. On the next page, enter the HKEY_CURRENT_USER\Control Panel\Mouse 7. Navigate through the options and tap on Mouse Sensitivity. 8. Right-click on Mouse Sensitivity and tap on Modify. 9. In the Value number, increase or decrease the number to modify the speed. Note:- The default value number is set at 10. Also, read How to Install Fonts on Windows 10 | Spice Up Words With Fonts
Wrapping Up
I hope you find this article useful. With the use of the above steps, you understand how to change mouse speed in Windows 10 or 11. These are the simplest methods to change the speed of your mouse. Now, it is time for a wrap-up. Keep visiting Path of EX for all the updates. Stay tuned!
Δ


